

Force Feedback
Force Feedback at the moment has only been tested with Microsoft’s Force Feedback 2 joystick.
Forces
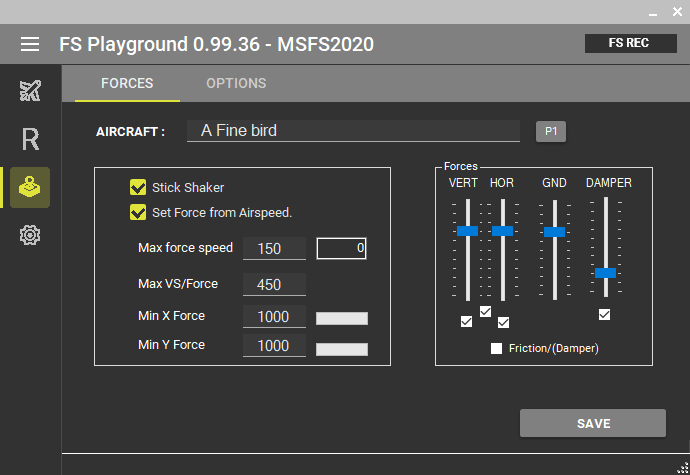
The forces – simulator interaction has been implemented in the Forces tab (Image 12) for the following parameters:
- Airspeed
The centering force is adjusted according to the current airspeed, by setting the speed that will create the maximum centering force on the joystick. The value is entered in the Max force speed textbox.
The maximum forces for each axis are set by the VERT and HOR sliders.
The force set at any given moment can be seen in the Min X Force and Min Y Force bars. The minimum recentering force (when airspeed is very low) may also be defined for the two axis here - Control stick on touchdown
Another force reproduced on the stick is the movement of the control stick on touchdown. The stick will jump with an intensity proportional to the touchdown vertical speed. The maximum force is set by the GND slider and will be generated at the specified feet per minute as set in Max VS/Force. While on the ground, the stick will move while taxings. - Stick shaker
And finally, force feedback may be used for the stick shaker functionality. When the stall warning is active, the stick shakes to warn the pilot of an imminent stall. Not all planes have this feature and for some may be not desired so this option may be turned off with the Stick shaker checkbox. - Friction
A great improvement of the joysticks operation, regardless of it’s force feedback capabilities, is that the friction or inertia to movement can be controlled. This creates a much improved feeling to the operation compared to a simple spring loaded stick.
Select either Friction or Damper and set it’s intensity. You will have to try and select what best fits your preference as this is quite subjective. Still a great improvement on the overall experience and something no spring loaded joystick can do.
Options
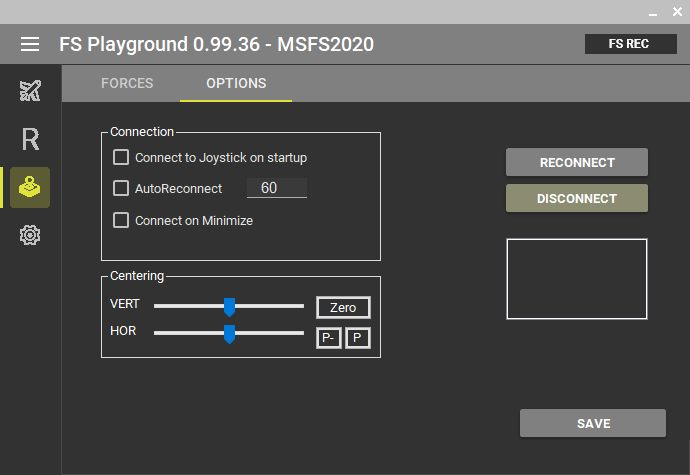
The Options tab (Image 13) offers technical oriented controls for the joystick.
- Connect to joystick on startup checkbox should be selected and causes the program to start using the force feedback as soon as it is launched.
- Auto Reconnect and Connect on Minimize are features that are not for the Flight Simulator so much. But since FS Playground may be used for joystick control with other games as well, these options make it possible to reconnect to the joystick either periodically or after 5 seconds once our application has lost mouse focus.
- The sliders VERT and HOR define the centering position of the stick.
- You can also Disconnect or Connect/Reconnect with the use of the two equivalent buttons.
- A connected joystick will be shown on the top right with the FF label and will be also shown in the devices list.
Options
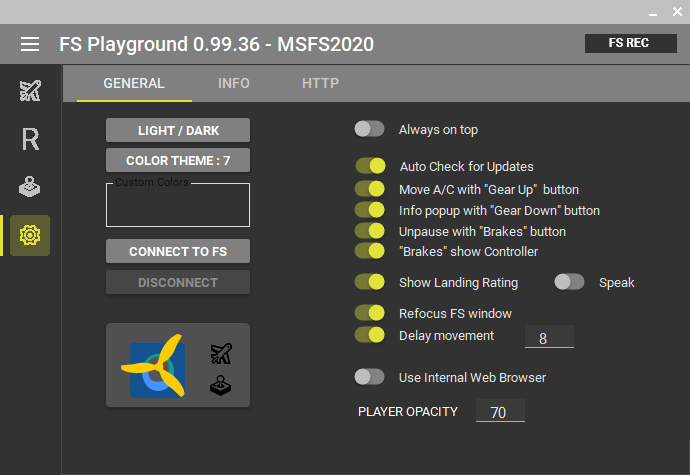
The Options screen (Image 14) will give us some control over the looks and general functionality of the application.
General
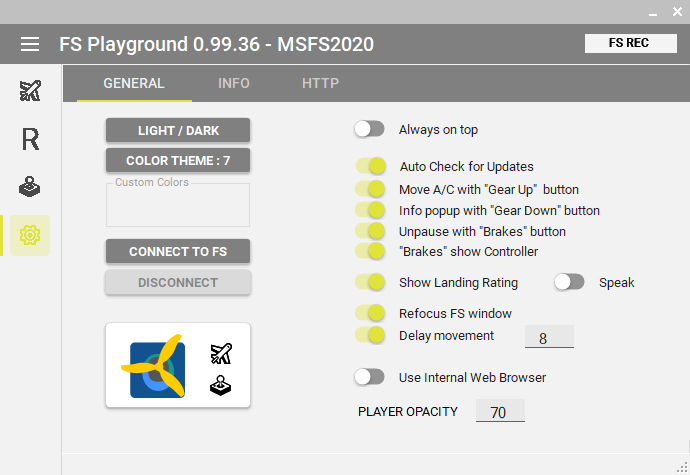
At the General tab there are seven preset Color themes, labeled 1 to 7. Color Theme: 0 can be customized to your preferences. The LIGHT / DARK button gives you the option of a light color theme and vice versa (Image 15).
Also there are the toggle switches,
- Always on top, as mentioned earlier, keeps the application on top. Useful for one monitor setups where we need the application available while Flight Simulator is running.
- Auto Check for Updates enables automatic update check and download.
- Move A/C with “Gear Up” button allows the moving of the aircraft while on the ground by activating the gear up joystick button.
- Info popup with “Gear Down” button will re-display the landing info assuming a landing has been detected after moving the aircraft.
- Unpause with “Brakes” button is used by the freeze on touchdown feature. Pressing the wheel brakes joystick button will resume movement, if frozen by this feature.
- “Brakes” show Controller will re-display the replay controller if it was hidden by it’s minimize button
- Show Landing Rating shows ratings at the moment of touchdown (Aircraft control – Main Control tab).
- Speak will use the text to speech engine to announce your landing vertical speed and sideslip. Especially useful if you fly in VR.
- Refocus FS window return of the focus to the FS window after a button is used in the replay controller.
- Use Player Control enables the replay controller in replay mode.
- Delay movement is the time in seconds that the plane will wait on high altitude before moved to the final position. As explained in the replay section, this is needed for long jumps where the scenery and ground is not loaded yet. You will have to trim this value to best match your systems timing.
- Use Internal Web Browser is used for the links that may be included in the “WEB” text boxes for each position and library.
- Player Opacity sets how transparent or not the Replay controller will be. Makes it less intrusive on top of the Flight Simulator window.
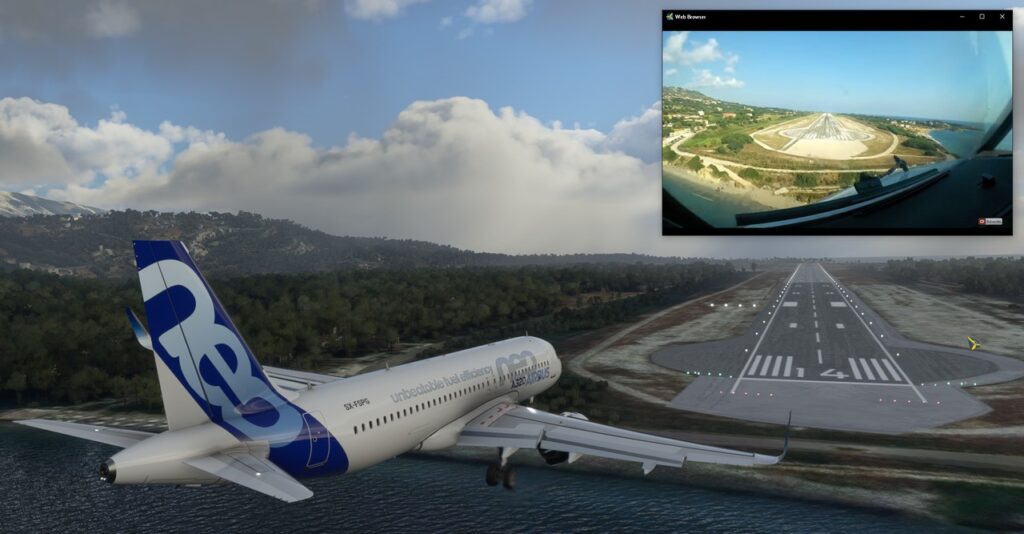
Internal Web Browser
The internal web browser is used for the links that may be included in the “WEB” text boxes for each position and library. It is an “Always on top” minimal window that can display for example that youtube video of a real landing. To use it you have to activate the option “Use Internal Browser” as mentioned above.
The first time you open a link with it, windows firewall may ask permission to allow connectivity for the browser. Also note that it listens on UDP port 50001 for remote commands from FS Playground.
The initial connection to youtube may be cumbersome, but as all the cookie goodness is stored on your PC it should be a smooth experience and videos will start on the selected time of interest.
Do not forget to double click on the video to get it to fill the entire browser window.
Info
The Info tab (Image 16) shows you the information regarding your account information.
- Name, the Name that was used for purchasing the software.
- e-mail, the e-mail that was used for purchasing the software.
- License number, order number of the purchase.
- PC Identification key.
- ACTIVATIONS button shows you the remaining available activations.

HTTP
Place holder. Coming soon!